 3-minute read
Launching Multiple Workflows From Google Sheets
Let’s consider a situation where we want to launch multiple workflows in Pneumatic automatically based on some tabulated inputs that we have in a Google sheets spreadsheet.
Learn about how to upload files to Pneumatic through the public API, publish them and include them as attachments in workflows.
One type of data field supported by Pneumatic is the attachment field. These expect the user to upload a file to Pneumatic:

For example, in a bug report SOP, the user may be required to upload a screenshot of the bug. Naturally, Pneumatic’s API also allows you to upload files, however, the process here is a tad more esoteric. Pneumatic has a secure industry standard process for uploading and sharing files through the public API.
It consists of two principal steps:
In the second step the system generates a sharable link to the uploaded file and an attachment ID, you can then insert the latter programmatically in attachment fields in your Pneumatic processes you launch through the API.
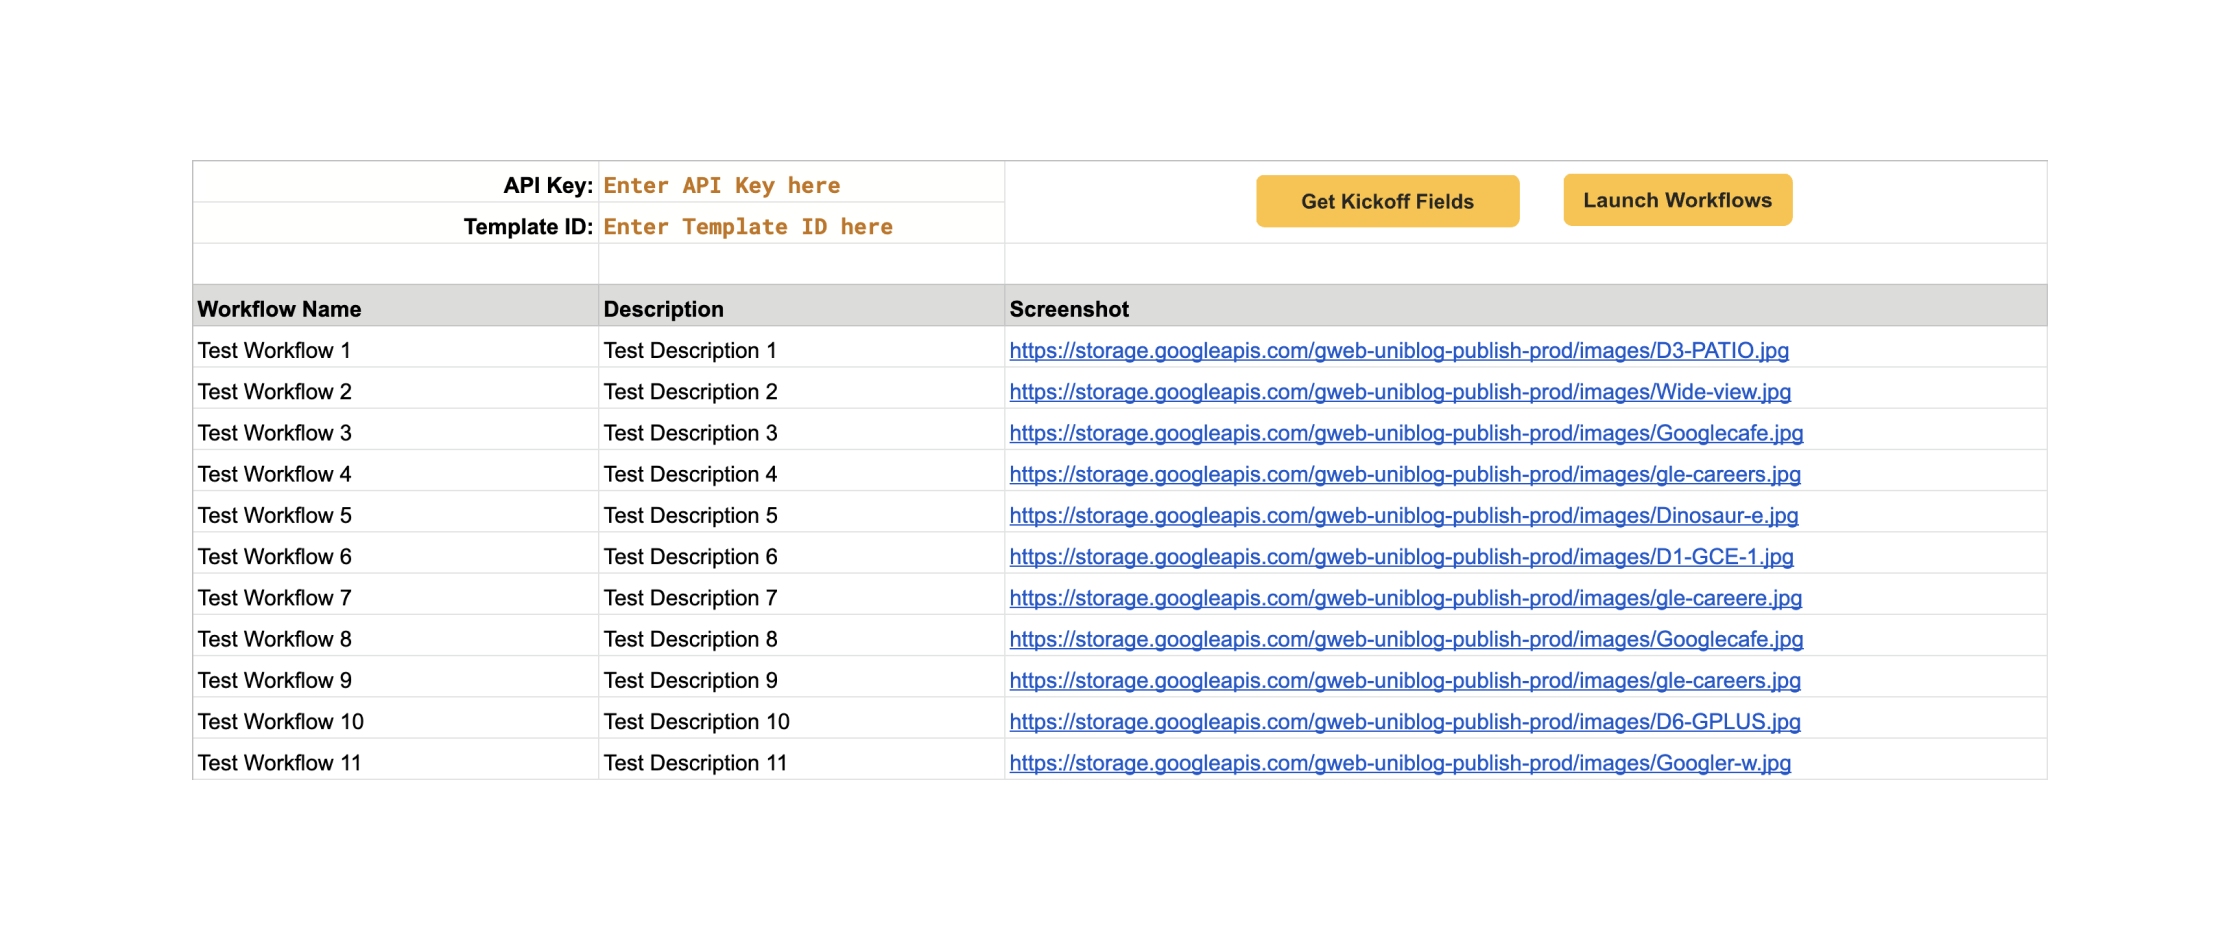
Let’s look at how it might work in Google Sheets. We’re going to use our Launch Workflows Example spreadsheet as our starting point.
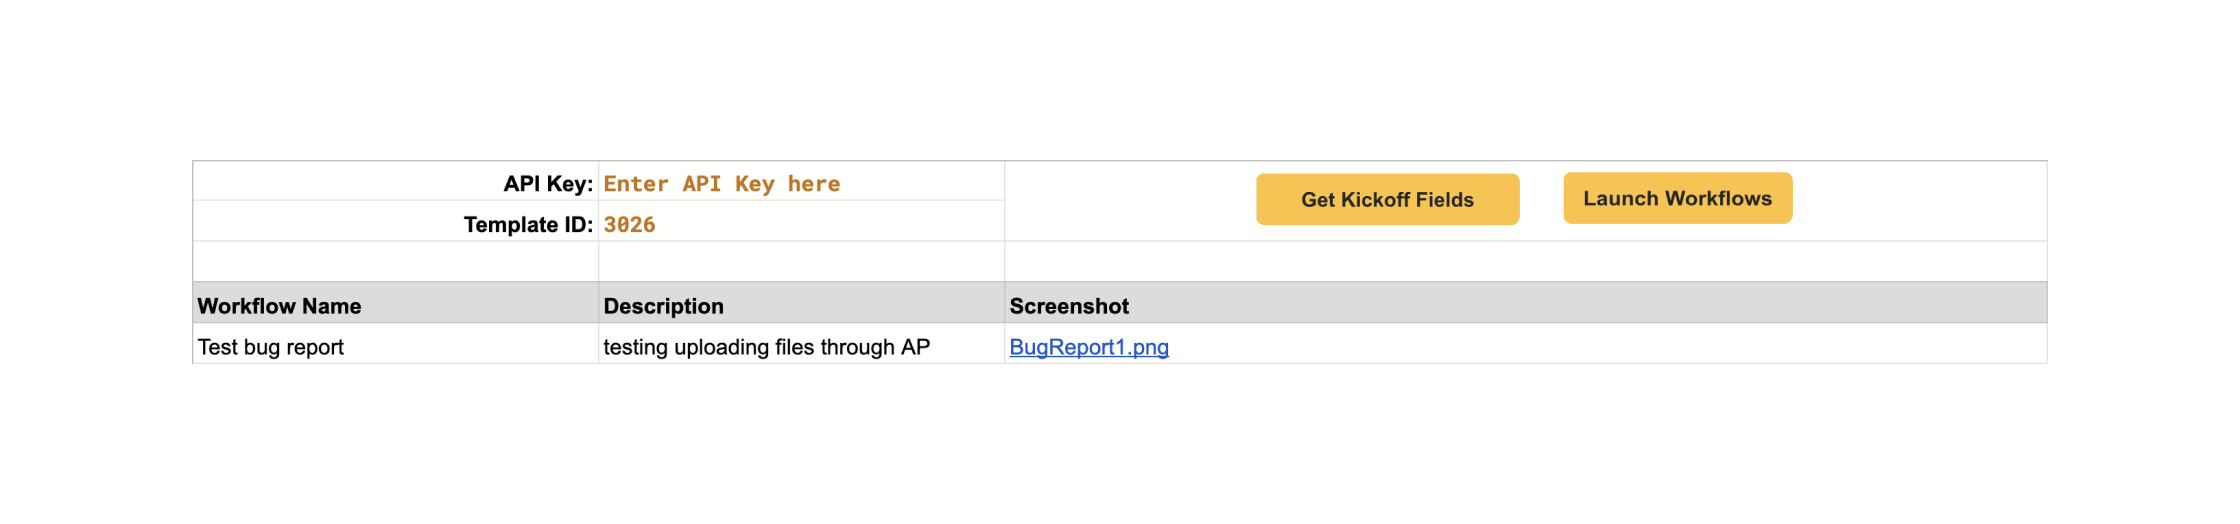
We’re going to use our Bug Reporting template (template ID - 3026), let’s just clear all the rows starting at row 4 and slick on get Kick-off Fields
I’ve got some pngs in my Google drive so we’re going to use one of them:

Let’s just add one line to our spreadsheet so as not to flood the system with bogus bug reports:
Now if I click on Launch Workflows, here’s what I get in Pneumatic:

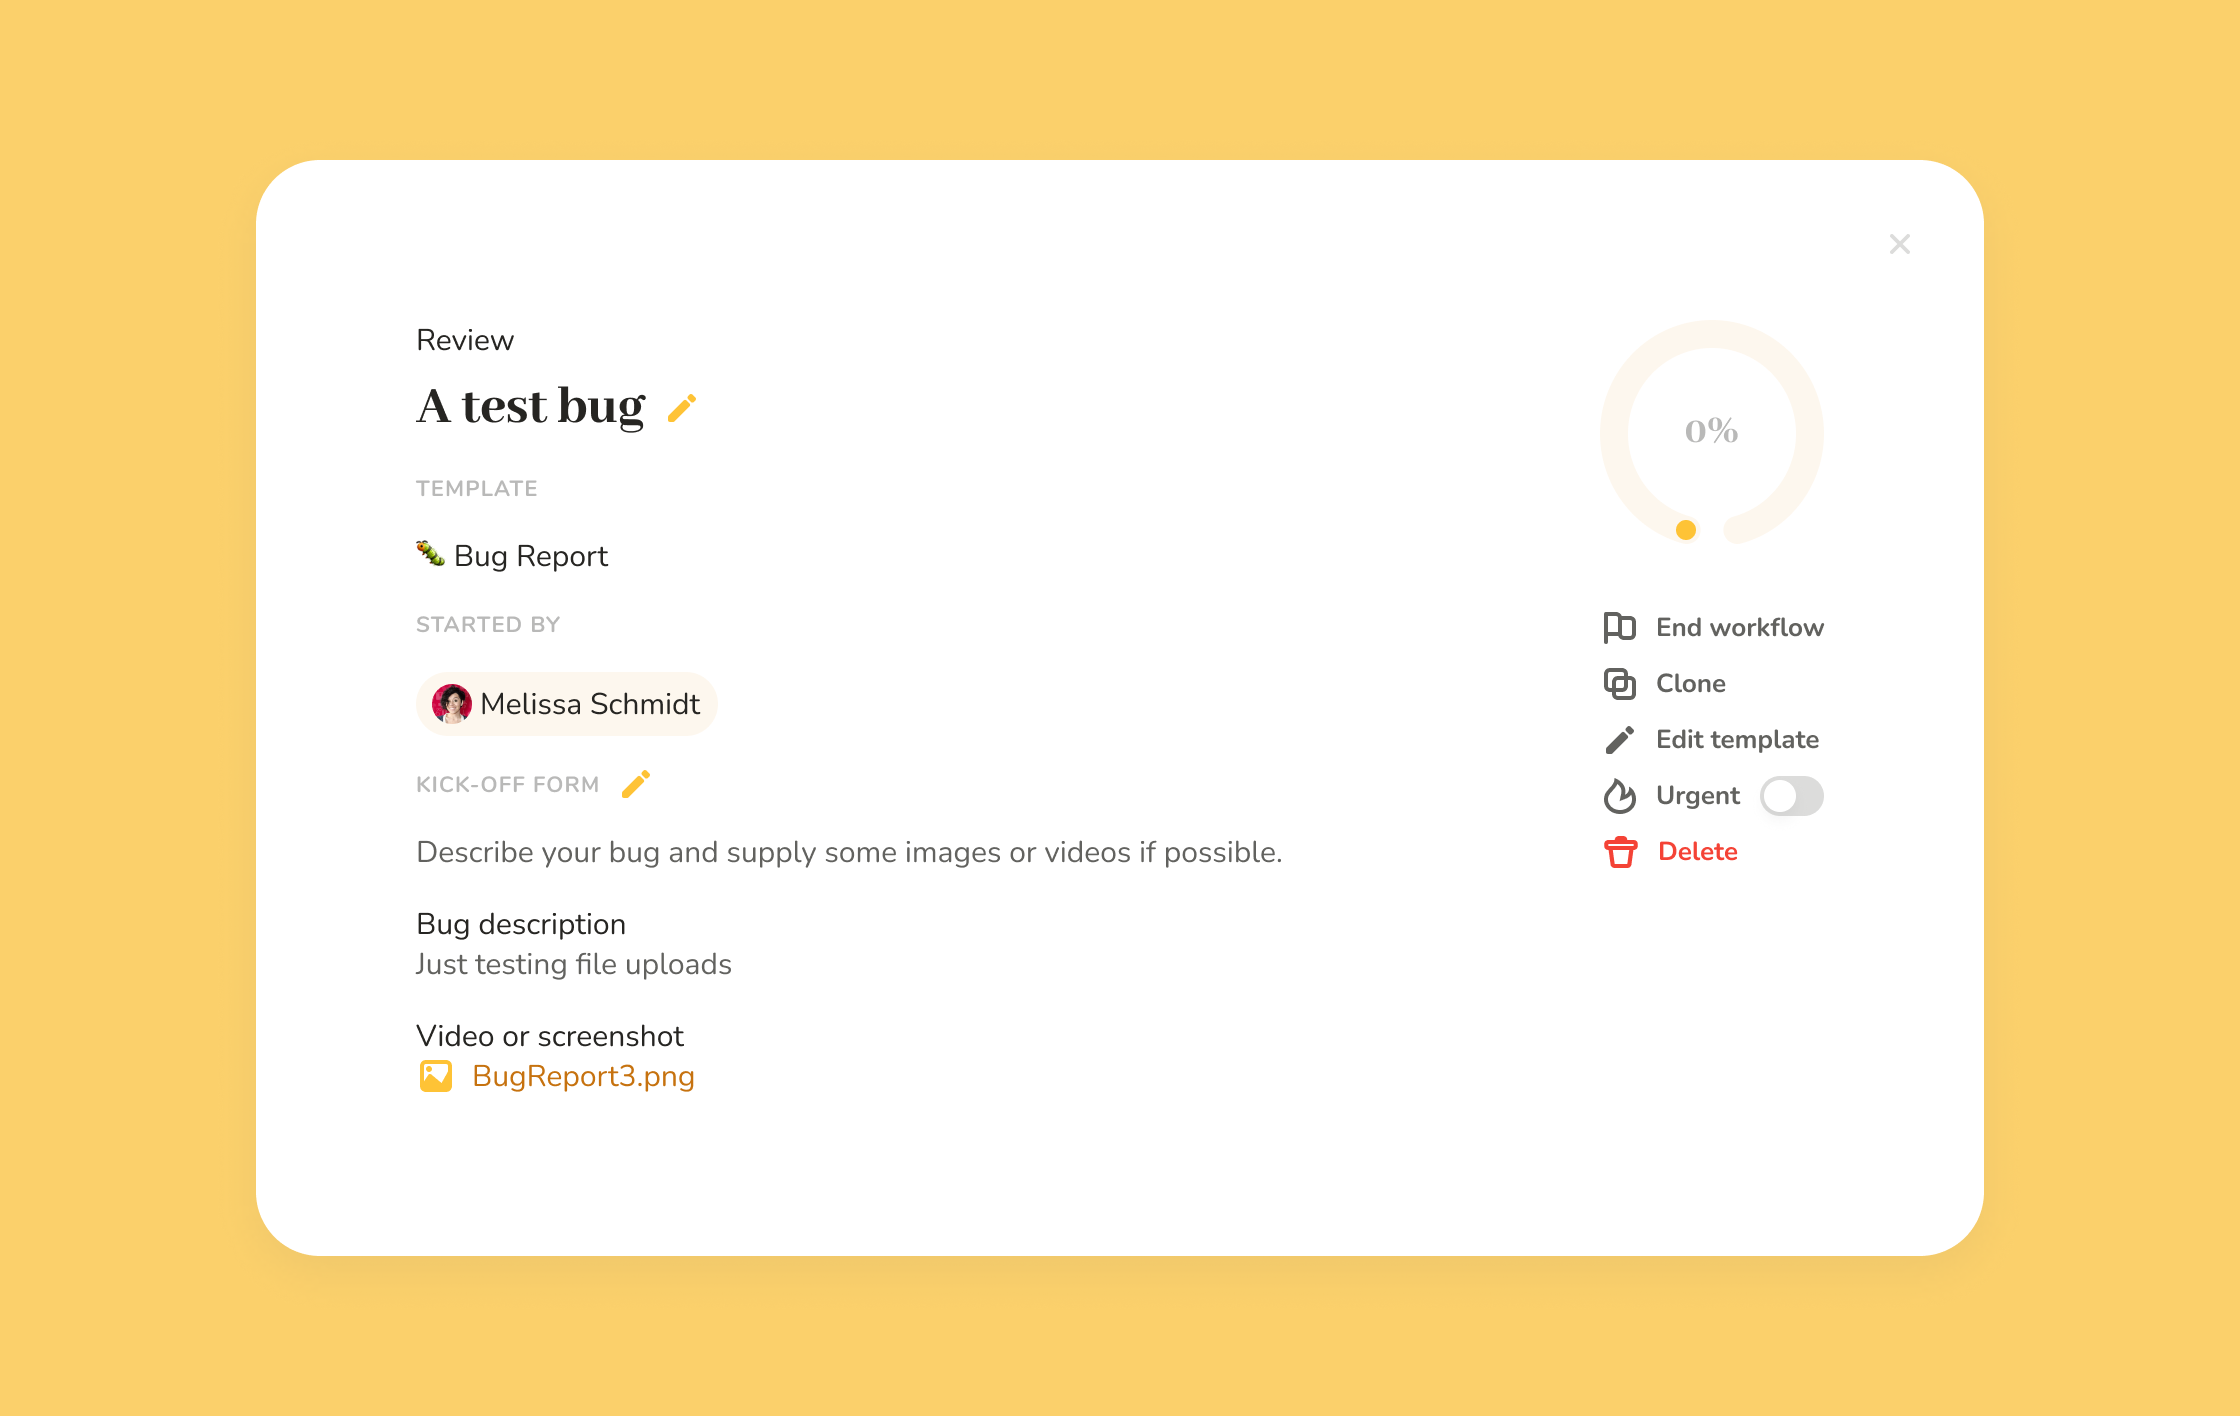
As you can see a new bug reporting workflow’s been started and my “BugReport3.png” file got uploaded to it as an attachment, albeit with a somewhat weird internal name.
Learn how to use Pneumatic’s API to launch multiple workflows in Pneumatic programmatically based on tabulated data in a Google Sheets spreadsheet.
So let’s look under the hood and see what’s going on there. I’m still using the same launchWorkflows function with just one minor tweak:
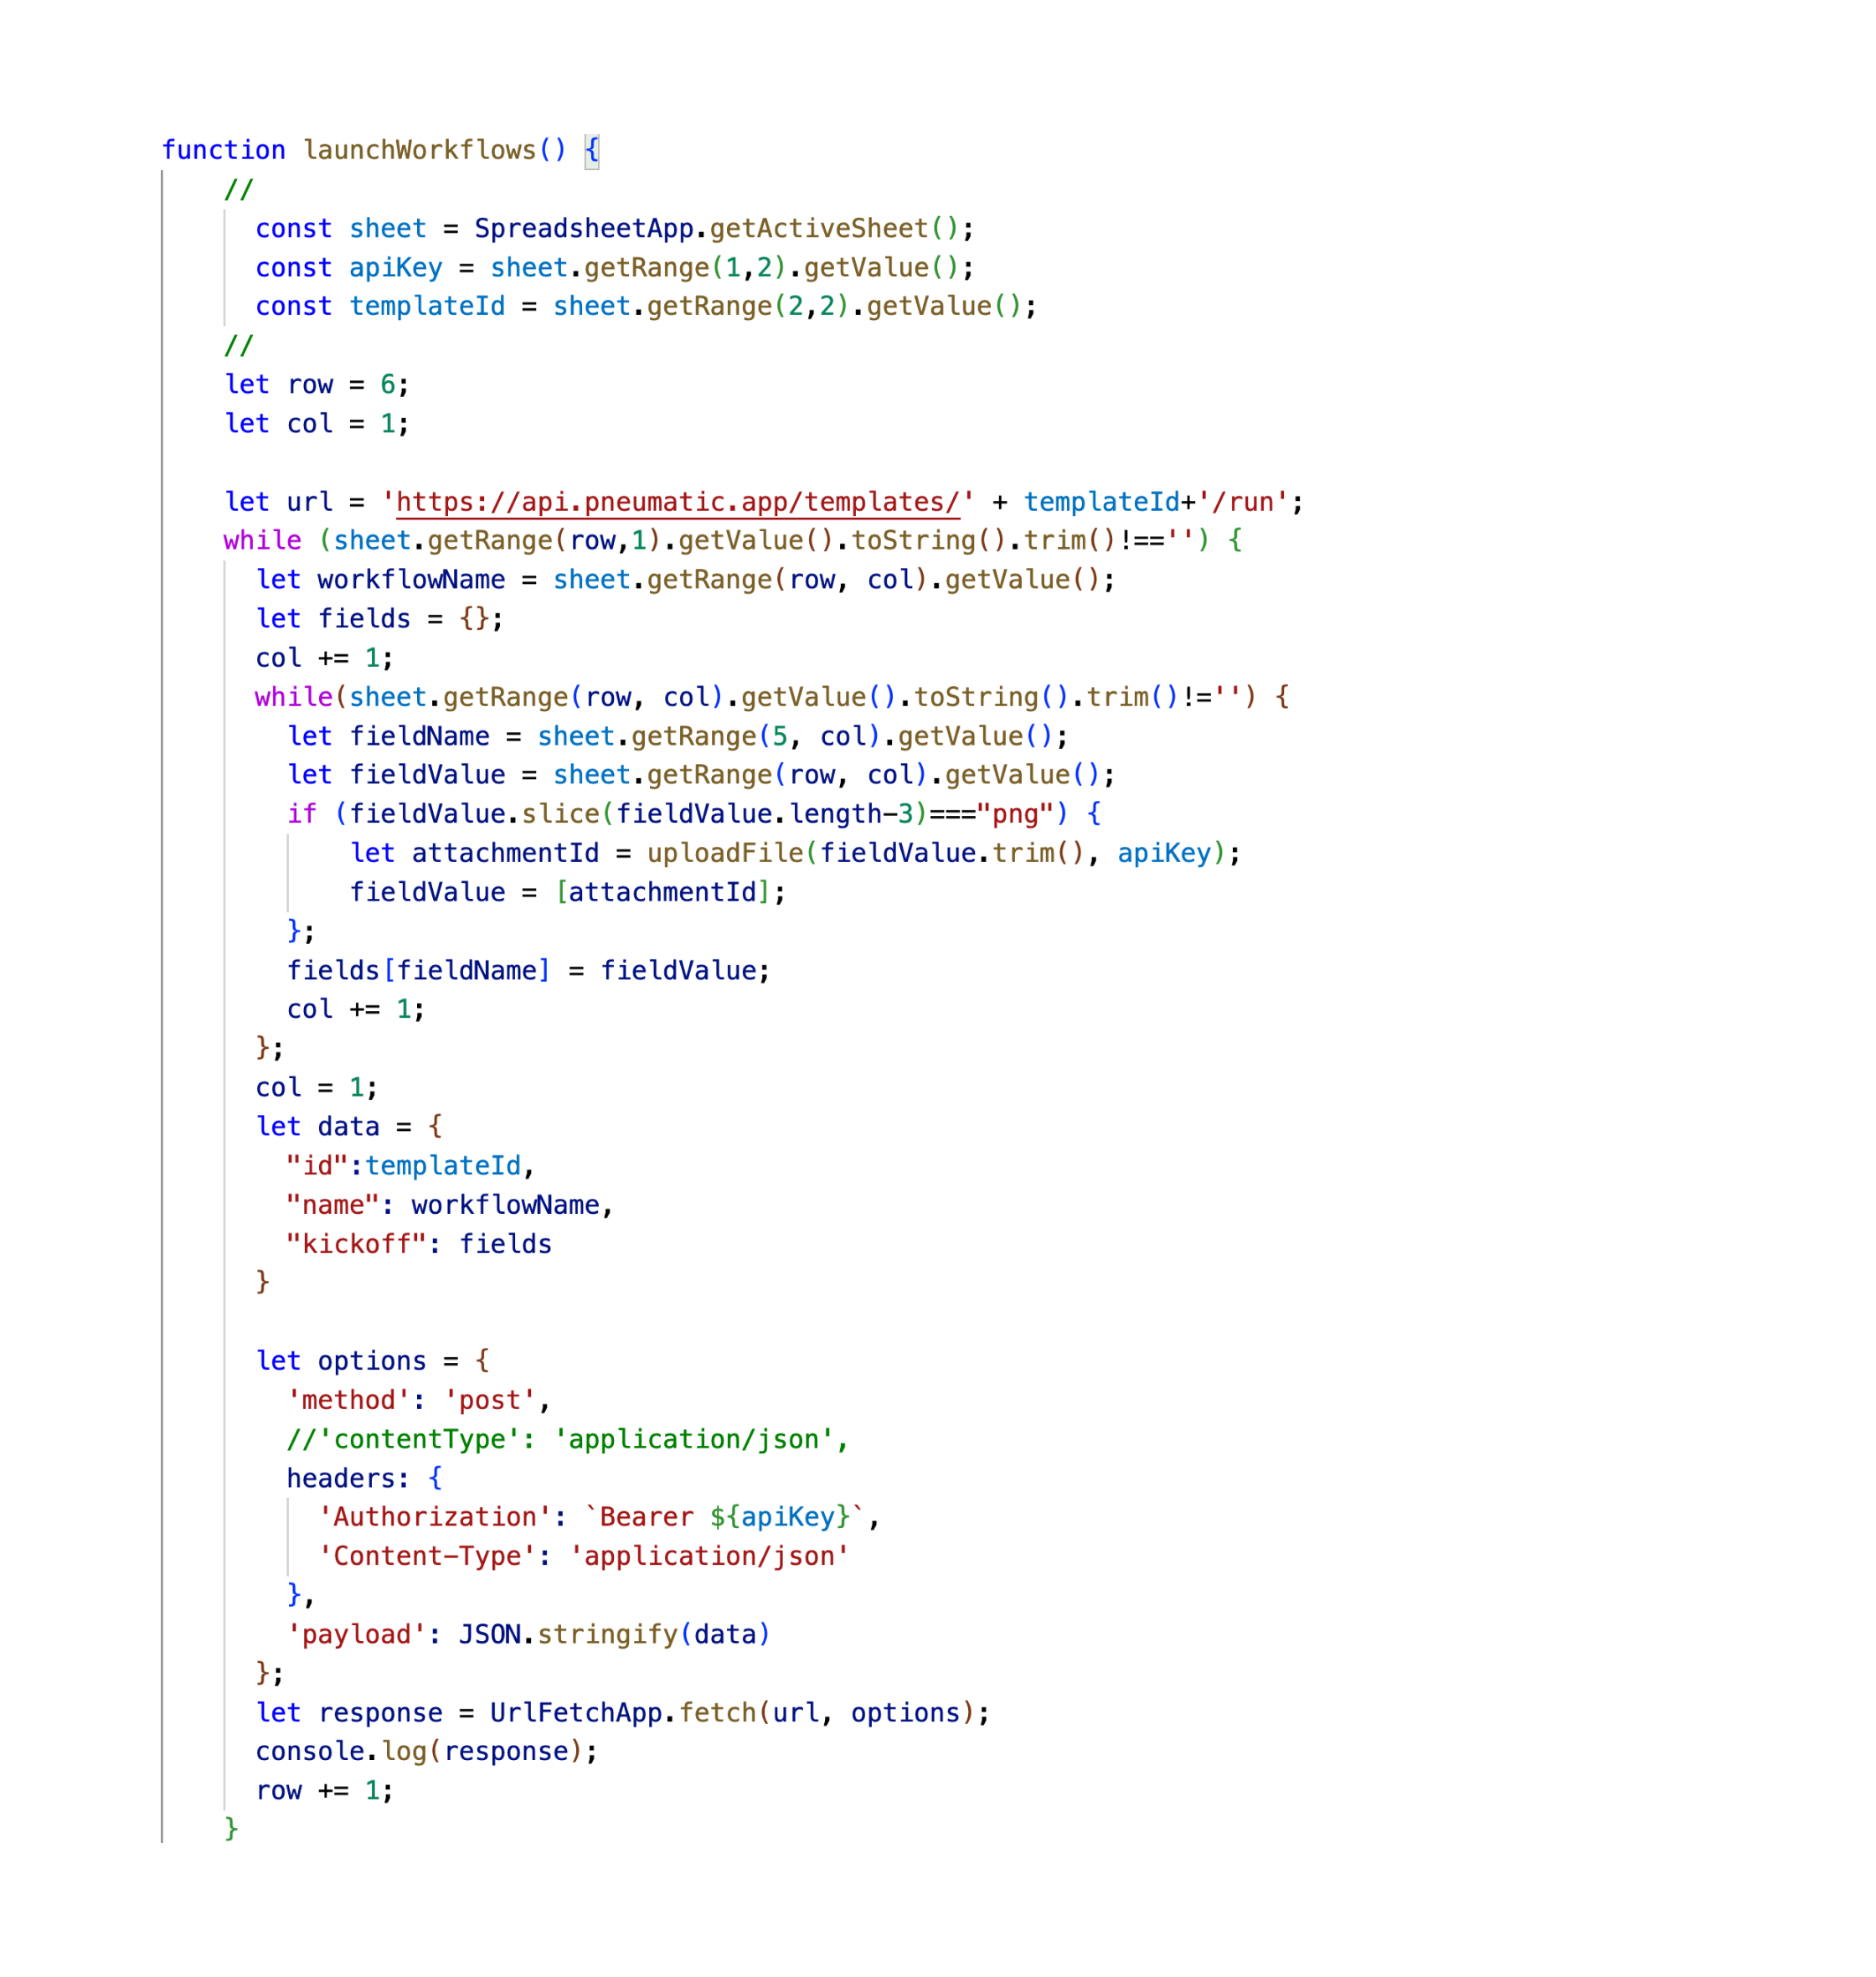
I check whether the string in the third cell in my row ends in “png” and if it does I call the uploadFile function, to which I pass the contents of the third row cell and the apiKey. Let’s look at the function itself now:
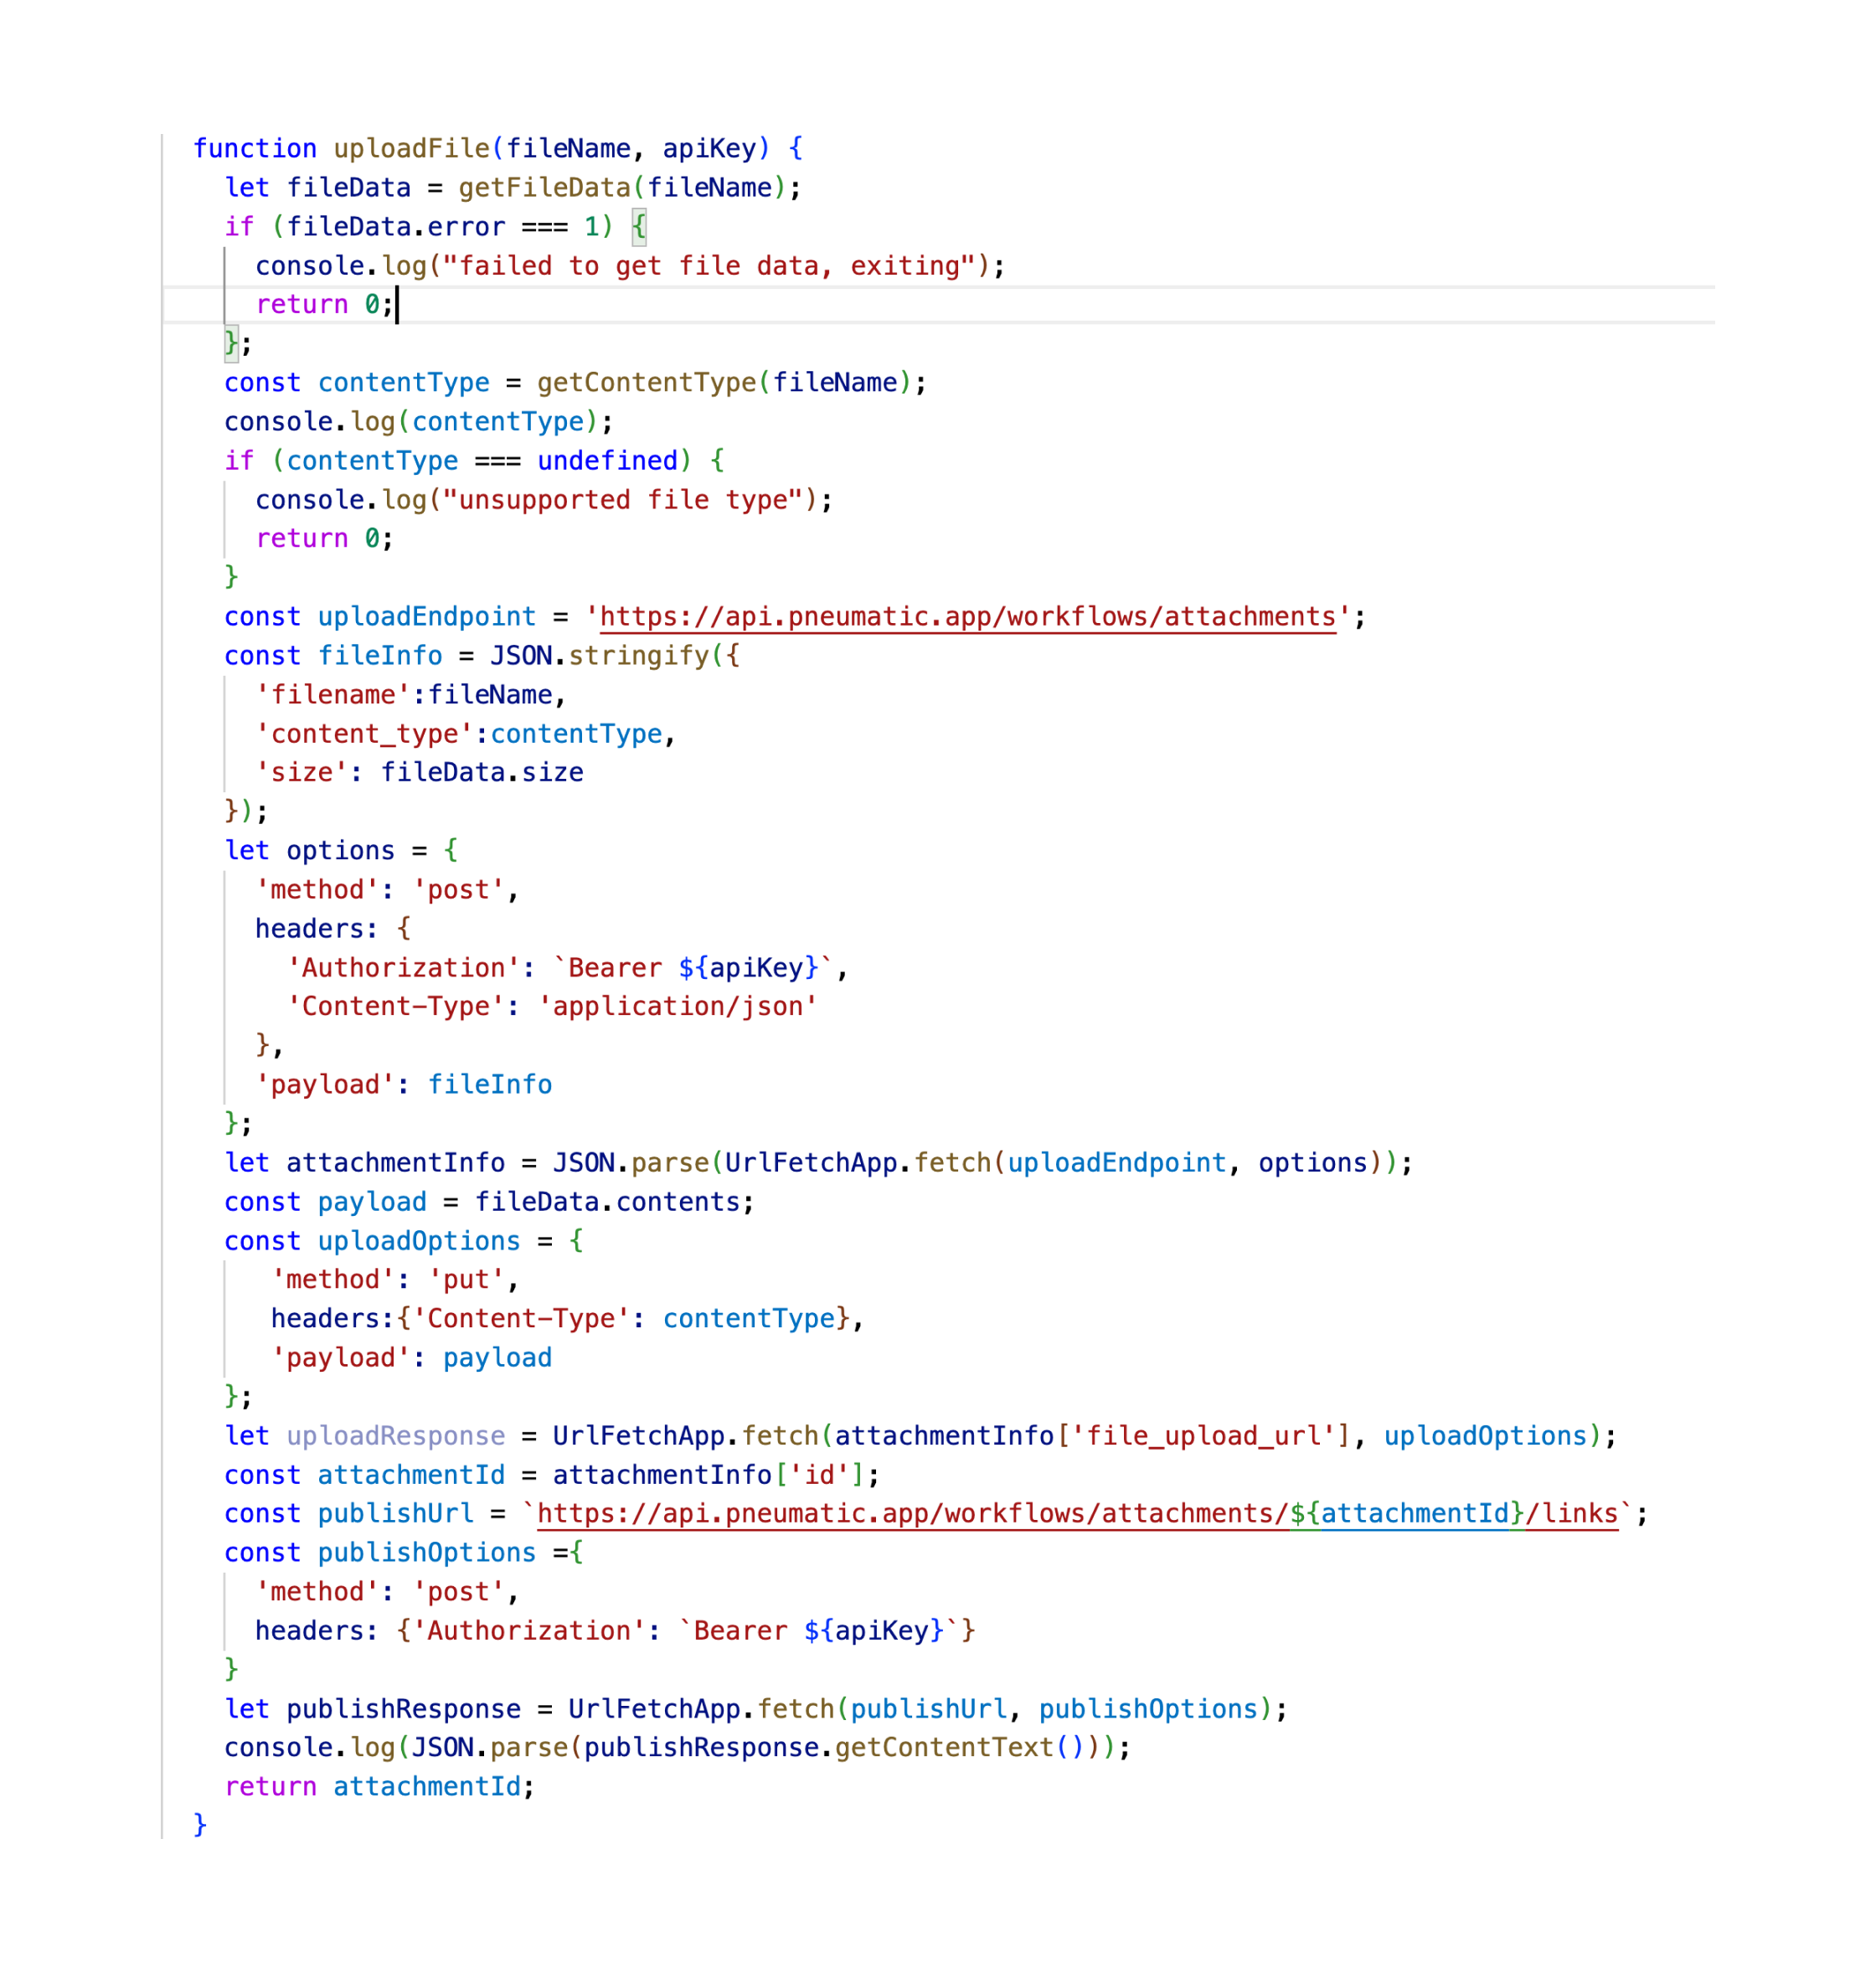
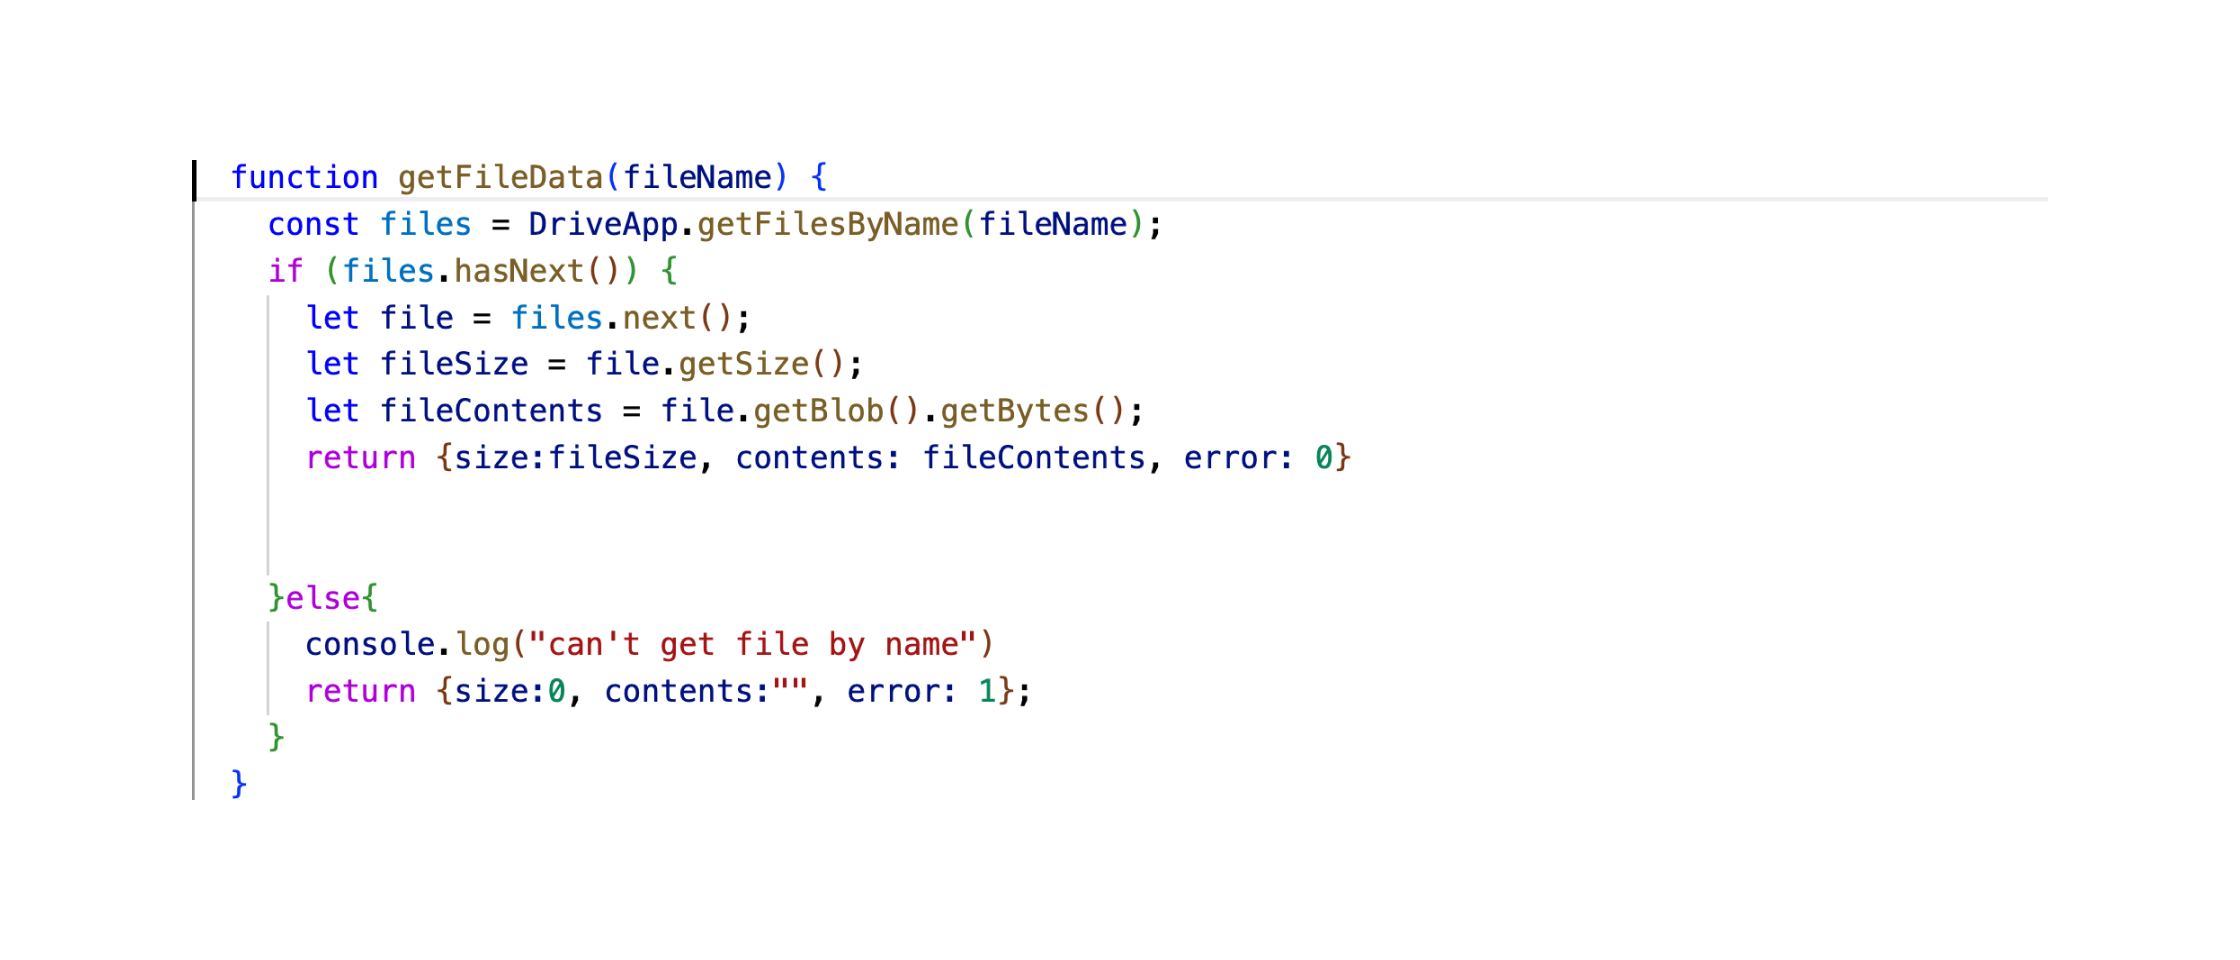
The function abstracts the aforementioned multi-step attachment uploading process. First we get file data as a byte array using the getFileData function.
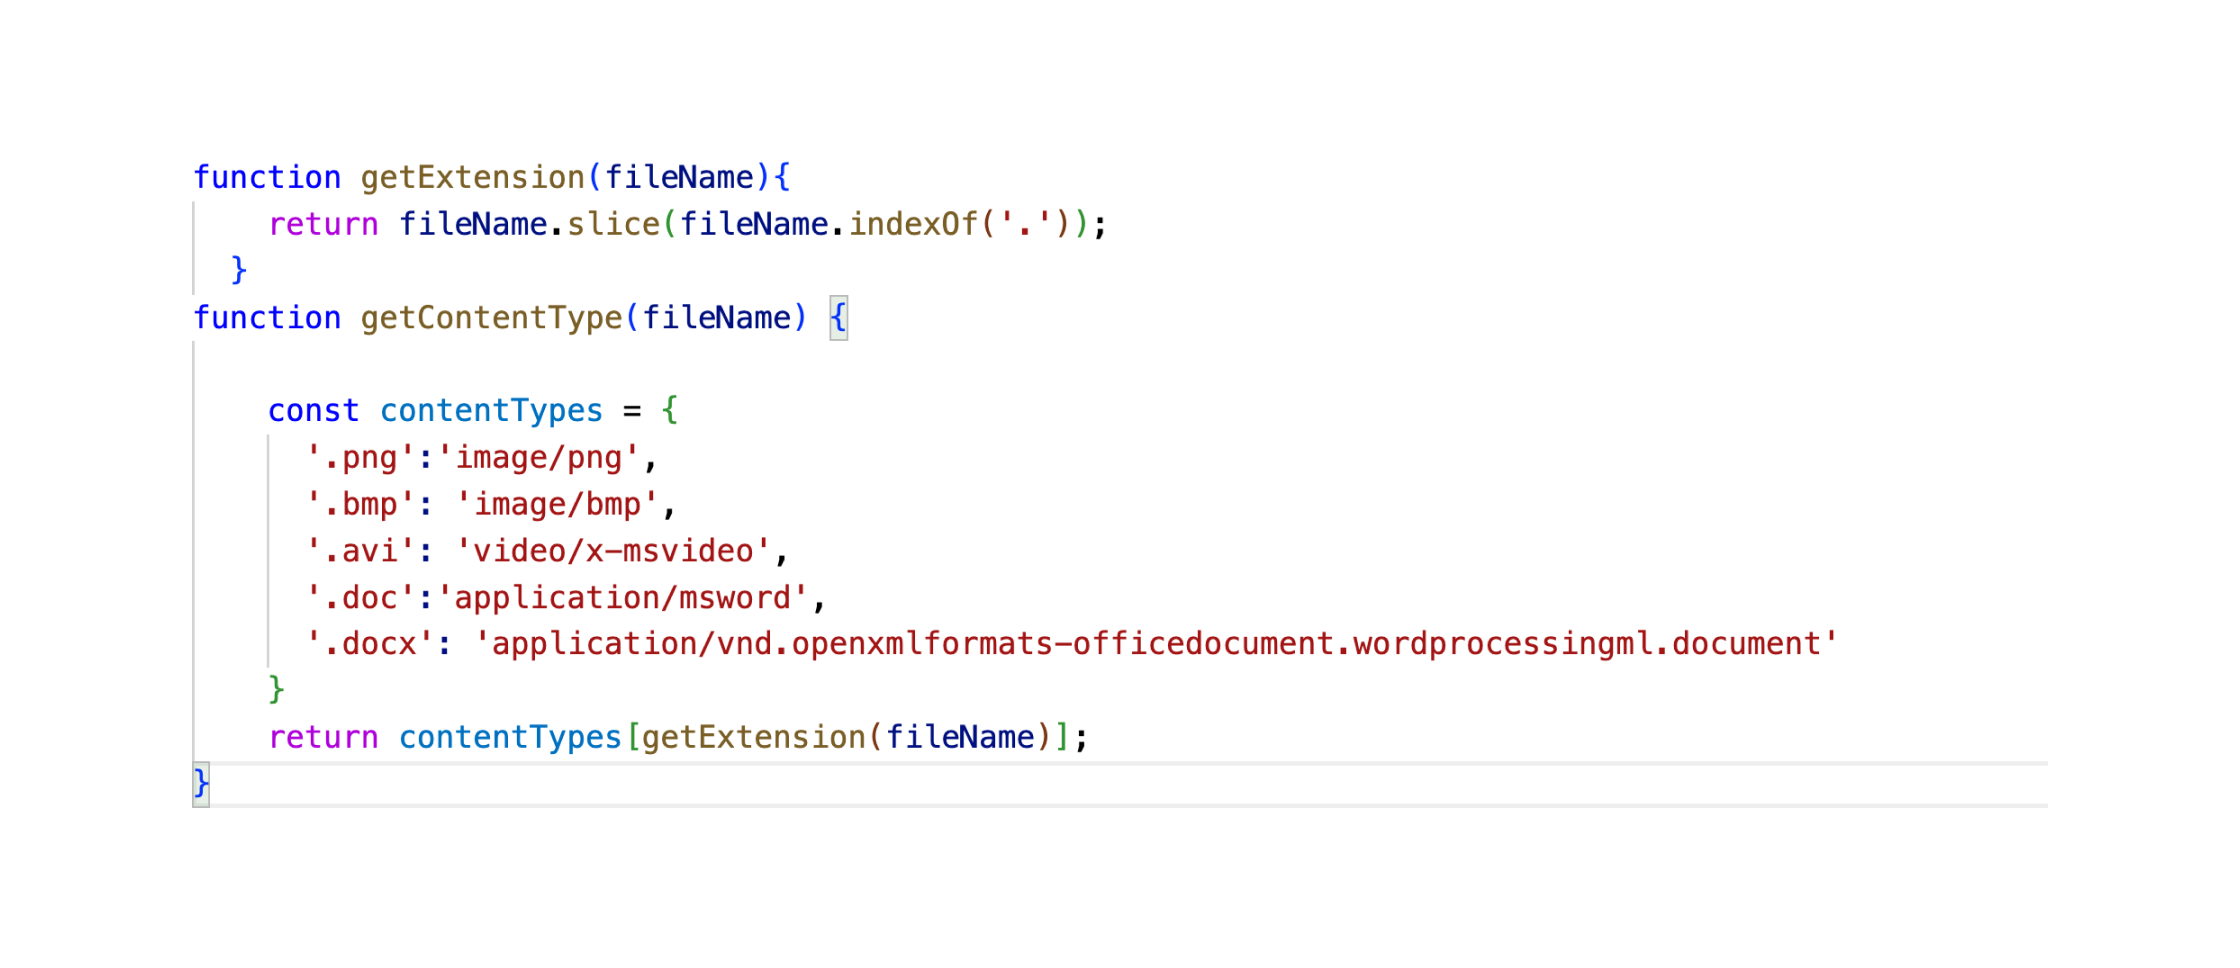
Then we determine the content type based on the file extension using the getContentType function:
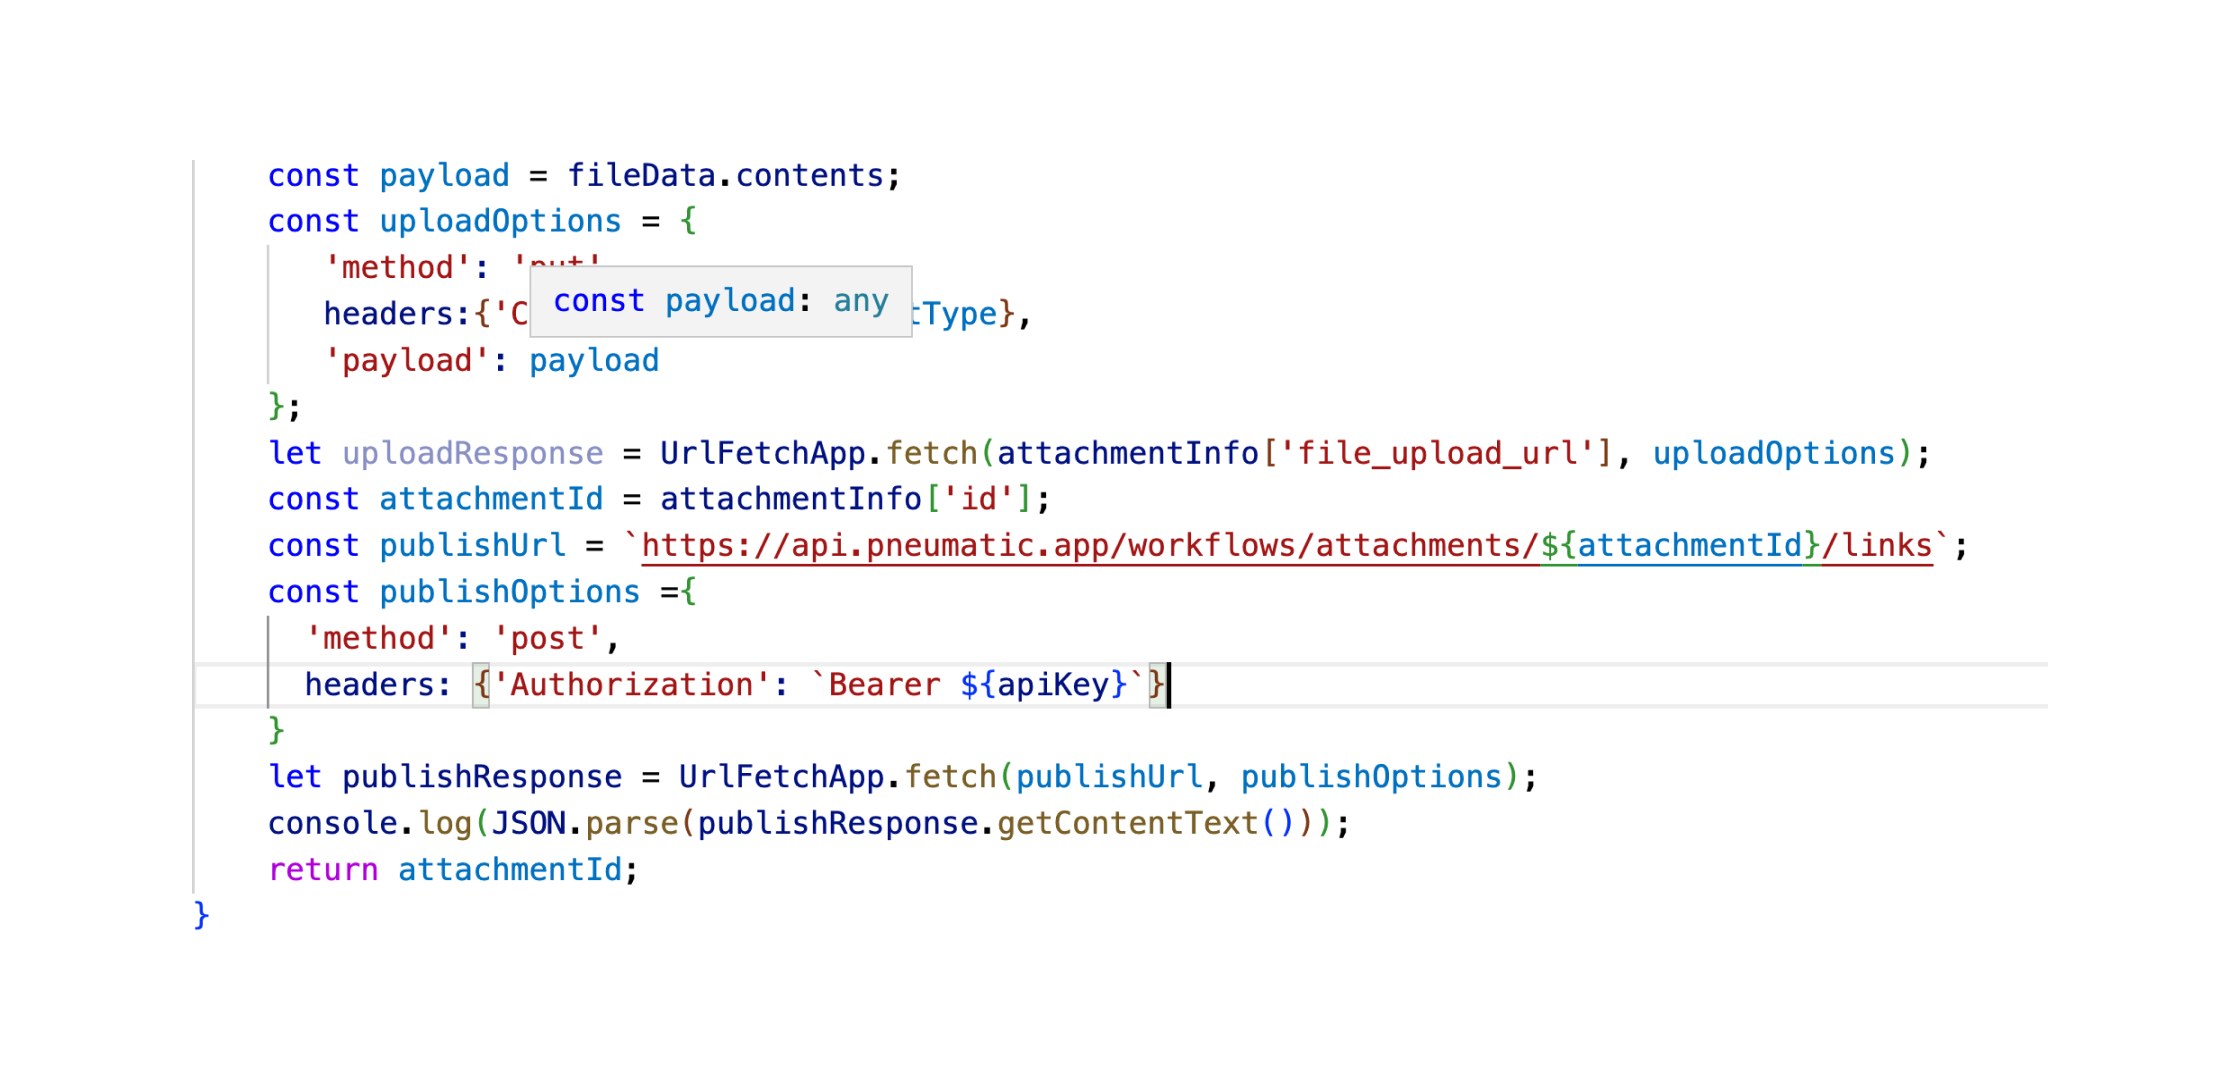
We then use the Pneumatic API upload endpoint to get attachment information for our file. To generate this information we need to send Pneumatic our file name, content time and the size of our file (which we also get in the getFileData function)

AttachmentInfo is an object that contains information about our attachment, including its ID. We use this ID in the code below to actually upload the file and then we return it to the calling function.
The very last step in the calling function (launchWorkflows) is to record the attachment ID in the field value of the new workflow that we’re launching in this step:
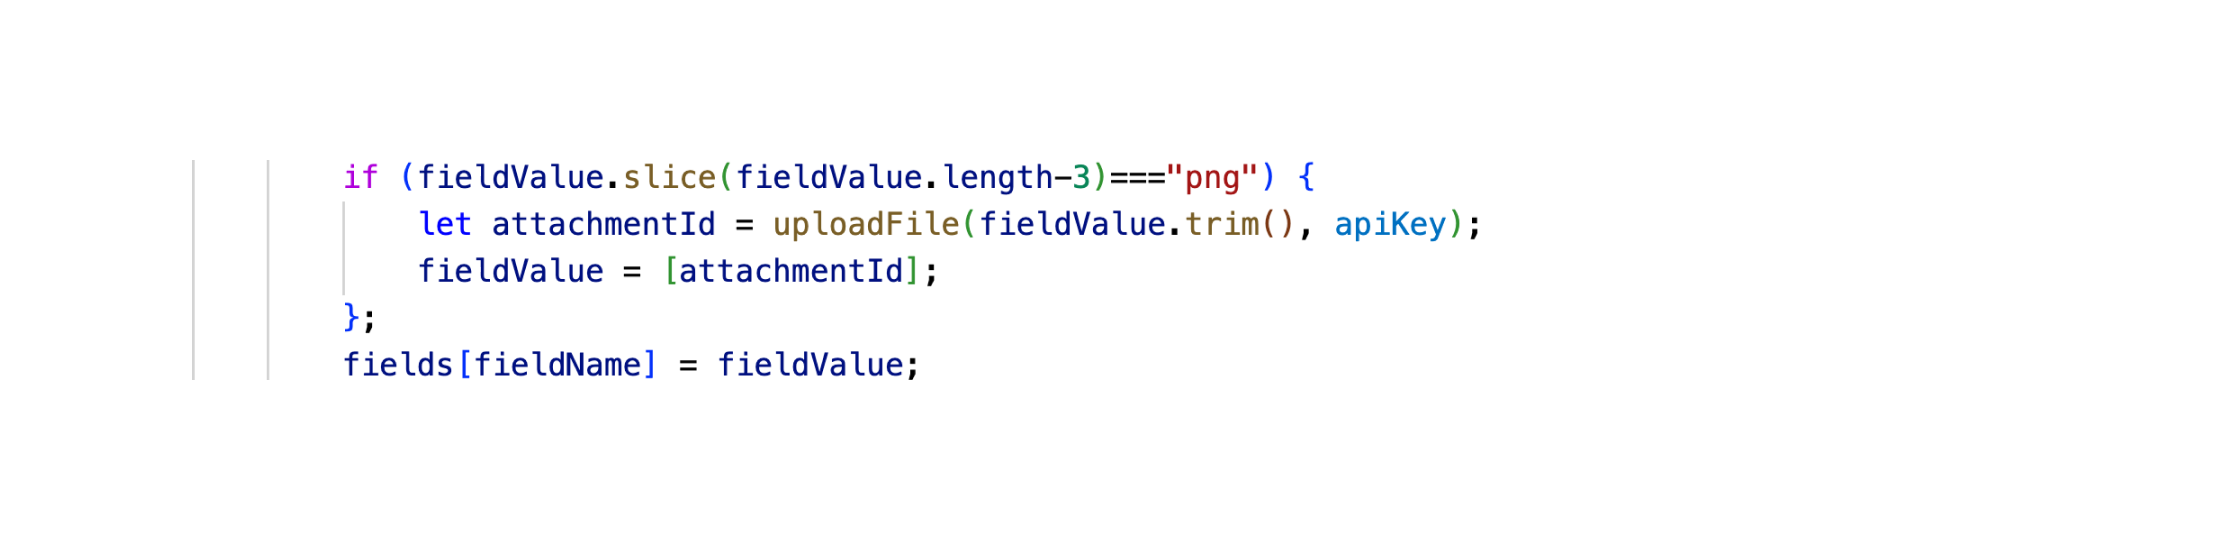
For attachment fields we need to pass in arrays, and naturally we can add multiple attachments, which we’re not doing here, but the option is there if you need it.
So essentially, if you need to upload files you can start by utilizing the uploadFile function found in this example, along with the getFileData, getContentType and getExtension helper functions. This way you won’t need to worry about the multi-step process for uploading and publishing files on Google Cloud. The function will just return the attachment ID for your file which you can then insert in your attachment fields.